Saturday, September 25, 2010

getting ready for our Fall Event!

twice a year - here at the store we host an event called a Creative Gathering - which is basically a get together for people who love this hobby to have fun and create! IT also takes ALOT of time and planning - so I apologize for not posting - between family this event and the store - my time is taken up & my brain is full!

but here is a cute story and project:-)

I have a customer who is a young man - he comes in every once in a while and picks up a kit I have made up, or gets me to help him out as he makes a project for his girlfriend - well he came in again about a week ago and asked if I could help him out - he wanted a album of photos - but also wanted it to "not have glue all over the place" were his words exactly. The reason for the project...he wanted to propose - well I normally do NOT do custom work, but seriously I could not say no-he is such a cutie-patootie. So I asked about the timeline - Wed night...and this was Monday... and he had not printed pictures yet!!!  So I showed him a couple of things in the store and with the instructions "she likes vintage and does not like pink" and a really tight timeline (by the time he brought me pics it was Tuesday) here is what I came up with:-)

Using The LOST and Found line from My Mind's Eye - lots of distress ink and some 7Gypsies and Tim Holz embellishments...


 I told him to scan in the grad photo and change to sepia - and I put a bunch of other photos of the 2 of them in the Maya Road envelope. 
I added this blank tag inside the back cover so he could add a note -  I had also had him write some personal stuff to her - so he wrote a "10 reasons I want to marry you" & a "favorite memories" list - which I just retyped and distressed to suit the album...


I haven't heard back for sure - but he seemed pretty confident she would say yes:-)

ttyl,
S

Wednesday, September 15, 2010

first days...

Dain going into Grade 1 :-)


Aubrey going into Pre-school:-)

love this one of her just running to the door- do you think she is a little excited???
 I hope your kiddies had a happy 1st day of school...Dain's layout is almost done, I need to work on Aubrey's will post soon!
ttyl,
S

fall is in the air...

If you have never checked out the Mennonite Heritage Museum here in Steinbach, you really should! It is a really fun day and if you love to take pictures, there are opportunities galore! My mom, 2 sisters and I took Dain & Aubrey, and my sister's kids Ethan, Tiana & Carter and of course some of the pics had to make it on a layout!
Here are just a few photos from our day!


I took lots of group shots so they made it into the following layout!


Products used were Imaginisce Fall line called Apple Cider, Rub-ons were October Afternoon (the leaves and all the words) the A Good Day tag is from October Afternoon, the circle sticker on top of tag is from Basic Grey "kraft basics" line, the title "Cousin's" is from Jillibean.

Happy fall to you!
ttyl,
S

Tuesday, September 7, 2010

Back to School...

wow - it is here! Back to school time is a great excuse to take pictures of the people in your life going back to school...or maybe you are going back to school as an adult - or even taking a few courses for special interest! September is such a celebration of learning and growth...I need to take pics of my kiddies in the morning to work on back to school layouts, but I wanted to show you a layout I did last year at this time!

it is a 12x12 layout on Kraft cardstock - I used Jumbo Java versamagic ink on the outside edges to make them look a little aged. Just 1-4x6 photo of Dain sitting at the desk - the paper in front of him says "First day of Kindergarten" so really that says it all!
I used my favorite rub-ons from the "Report Card" School line - by October Afternoon, I just cut the rub-ons into strips and transferred them to the cardstock at a slant. I then put the ruler rub-on at the bottom of the page and circled the #5 (as he was 5 in this picture) I used little strips of the recess paper to accent the page and the "year,grade,teacher" die-cut was from a journaling card from the same line.

have a great day today!!!

ttyl,
S

Saturday, September 4, 2010

from a 5 year olds point of view...

I own a Nikon D60, which I love:-) it takes great photos and it is one of my favorite tools for Scrapbooking, so it makes me a little nervous when my son asked if he could "just take a few pictures mom" - so I handed it over, making sure the strap was securely around his neck... here are a few pics he took!

great action shots Dain! These pics are of his friends Logan & Grayson who came over to jump on the trampoline!

I have a soft spot for this one he took of me:-)
and Aubrey and I on the trampoline - she did NOT want to be in any pictures!!!
I will not hesitate to hand over the camera next time he asks, I could not believe it when I saw the pics!
Now to scrap them:-)

ttyl,
S

Thursday, September 2, 2010

Quick & Easy...

are you feeling a little overwhelmed by the amount of photos you take and the lack of time you have to scrapbook them? I want to introduce you to these awesome page protectors from WeRMemory Keepers
They are a mixed package of divided page protectors, made to mostly fit your 4x6 photos, each slot has an opening that allows you to put in a photo towards to front of the page protector & slide one in behind it so it faces the other side, allowing you to put over 80 photos in one Multipack. There is 1-12x12 protector, so that allows for a title page or really special photo(s) to stand out.
Step 1 - organize your photos according to date (if you are a chronological scrapbooker) or event, or just in any order that you like.
Step 2- take a closer look at your photos - how many are landscape(4inches highx 6 inches wide) and how many are portrait(6inches highx 4inches wide)
Step3 - according to your photo needs, choose the page protector out of the multipack and start inserting your photos.
Step 4 - don't fill every spot:-) leave some of the spaces for adding patterned paper, journal spots, stickers and other embellishments - keep in mind if you use double sided paper, you can put one piece in the slot and it will look different on both sides of the page protector:-)
Step 5 - be amazed at how quickly you scrapped an event, a vacation or just got some photos into an album!!!

I take a tonne of pics, and I also have the opportunity to scrap alot of them, however I love to Scrap my favorites or do a mini book with the really special ones, but this allows me to put the rest of my photos into an album, still feeds that need to pretty it up with scrappin supplies - and the photos can be looked at!

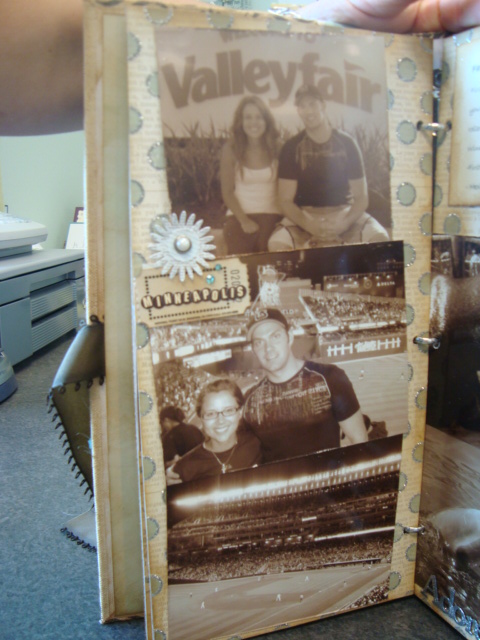
Here is a sample of what I did with a bunch of summer pics from 2009-


 I did not use them all (missing 1) and look at ALL the photos I scrapped.  The organization of the photos takes the longest, but once you are done that part - you will just zip along!

So if you are feeling a little overwhelmed by the projects vs time ratio, I would encourage you to try one of the packages of divided page protectors. (They come in many different styles)
***I used Cosmo Cricket "Garden Variety" paper line, Scenic route journal stickers, buttons, ribbon & flowers-misc, Jillibean yellow letter stickers